
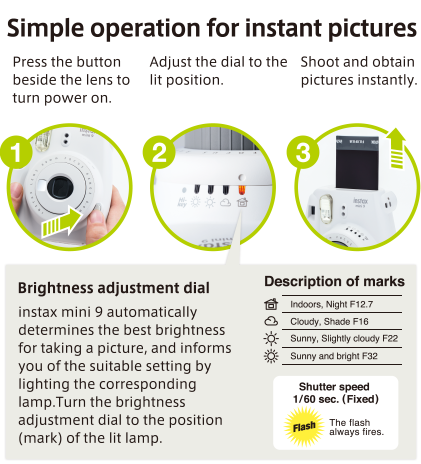
The Instax Mini 9 settings include a brightness adjustment dial and a selfie mirror. Select the proper setting by turning the dial to match the LED indicator.
Capturing memories with the Instax Mini 9 is a blast from the past with a modern twist, appealing to photography enthusiasts and nostalgia lovers alike. This instant camera simplifies snapping quick photos while infusing the process with excitement and a touch of anticipation.
Its straightforward design includes a variety of settings to ensure your pictures turn out just right, whether under the sun or indoors. The built-in flash and manual exposure control help you to adapt to different lighting conditions, while the high-key mode can give your prints a softer look. With its charming design, easy-to-use features, and instant photo gratification, the Instax Mini 9 continues to be a popular choice for those who enjoy the tangible feel of a photo in their hands immediately after the click of a shutter.
Capturing Moments With Instax Mini 9
Imagine freezing a moment in time with a click. The Instax Mini 9 makes this magic happen. This camera is all about fun and simplicity. Keep reading to discover the joy of instant photography and the easy-to-use settings of the Instax Mini 9.
The Charm Of Instant Photography
Instant photography brings a unique thrill. Every snap turns into a physical memory in minutes. The Instax Mini 9 nurtures this excitement perfectly. Can you picture holding a fresh print in your hands?
Key Features Of The Instax Mini 9
The Instax Mini 9 is packed with features that ensure great pictures. Let’s explore what makes this camera a must-have!
- Selfie Mirror: Capture selfies with ease.
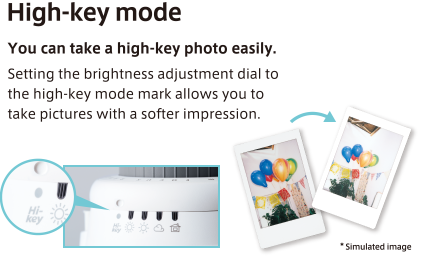
- High-Key Mode: This setting lets you take pictures with a softer impression.
- Brightness Adjustment Dial: The camera selects the best brightness for your photo, and you can manually adjust it too!
With these features, creating lasting memories is as simple as point, click, and print!
| Feature | Description |
|---|---|
| Close-up Lens Attachment | Perfect for shots closer than 35cm. |
| Built-in Flash | Automatic flash for low-light environments. |
| Exposure Counter | Tracks remaining shots so you never run out unexpectedly. |
Credit: instantcamerablog.com
Getting To Know Your Instax Mini 9
Welcome to the world of instant photography with your new Instax Mini 9! This nifty little camera is your ticket to capturing memories on the go. Let’s get familiar with your Instax Mini 9 so you can start snapping away in no time!
Unboxing Your Camera
Unbox your new camera with excitement. Inside, you will find:
- Your Instax Mini 9 camera
- A strap to keep it handy
- Close-up lens attachment for detailed shots
- A set of AA batteries
- Instruction manual for easy guidance
Take each item out and place them on a clean surface.
Identifying Each Part And Button
Get to know every part and button on your camera:
| Part/Button | Function |
|---|---|
| Lens | Look through to frame your photo |
| Shutter Button | Press to take a picture |
| Flash | Lights up your subject |
| Brightness Adjustment Dial | Turn to fit the lighting |
| Film Counter | Shows remaining shots |
| Power Button | Press to turn on/off your camera |
| Film Slot | Where the magic happens and photos come out |
Each button and part is crucial for taking great photos. Play around and get comfortable with their locations.
Preparing For The First Shot
Excitement buzzes as you hold your new Instax Mini 9. It’s a magical little camera that promises to turn special moments into tangible memories. But first, let’s set the stage for that perfect first snapshot. Follow these simple steps to get your camera ready. Remember, every picture tells a story! Be ready to tell yours.
Loading The Film Correctly
Getting the film into your camera is like planting seeds in a garden. Do it right for the best growth. Begin with a fresh Instax Mini film pack. Check that the yellow marks on the camera and film align. This ensures a match made in photo heaven. Here’s how to proceed:
- Open the back door of your Instax Mini 9.
- Align the yellow mark on the film pack with the one in the camera.
- Insert the film pack gently into the slot.
- Close the back door until you hear a click. This signals a secure fit.
Powering On And The Power Light Indicators
Next step: Wake up your camera! Simple and easy, just press the button next to the lens. The lens pops out, saying “Hello!” to the world. Now, look at the power light. It’s the camera’s language for readiness. Here’s what the lights mean:
- A blinking light? Wait for a bit. The camera is warming up.
- A steady light? All set! Time to capture moments.
Keep an eye on those lights. They guide your journey from plain sight to picture perfect. A steady glow and you’re on your way to photographing life’s little treasures. After these setups, aim your Instax Mini 9 and press the shutter button. Hold still for a second. Congratulations! You’ve just framed a snippet of life.
Mastering The Shooting Modes
Welcome to the world of instant photography with your Instax Mini 9! Knowing how to operate the shooting modes of your camera can take your photography game to the next level. Let’s delve into mastering these modes to capture perfect shots every time.
Adjusting The Lens Setting
Your Instax Mini 9 boasts a fixed lens with two focus ranges. Adjust the lens to match your subject’s distance.
- Selfie mode: Pull the lens out until you see the ‘Selfie mode’ mark when you’re up close.
- Normal mode: Push the lens back in for further subjects.
Rotating the lens ring to the house icon activates the close-up lens function, perfect for shots between 35-50cm.
Selecting The Right Exposure
The Instax Mini 9 sets exposure levels automatically. This ensures the best lighting for your photos.
The light sensor beside the lens suggests the ideal setting which appears as a lit-up lamp.
| Symbol | Condition | Use When |
|---|---|---|
| House | Indoor | Low light places |
| Cloud | Cloudy | Overcast days |
| Sun | Partly Sunny | Some sunshine |
| Very Sunny | Outdoor Bright | Under the bright sun |
| High-Key | Soft Look | For a bright photo with soft look |
Rotate the dial to the highlighted symbol to set the exposure right. The High-Key mode helps you capture photos with a softer impression.
Creative Tips For Using Instax Mini 9
The Instax Mini 9 is not just a camera; it’s a creative companion that captures memories with a personal touch. With its simple settings, users of all ages can take fantastic photos. This section offers tips to unlock the camera’s full potential.
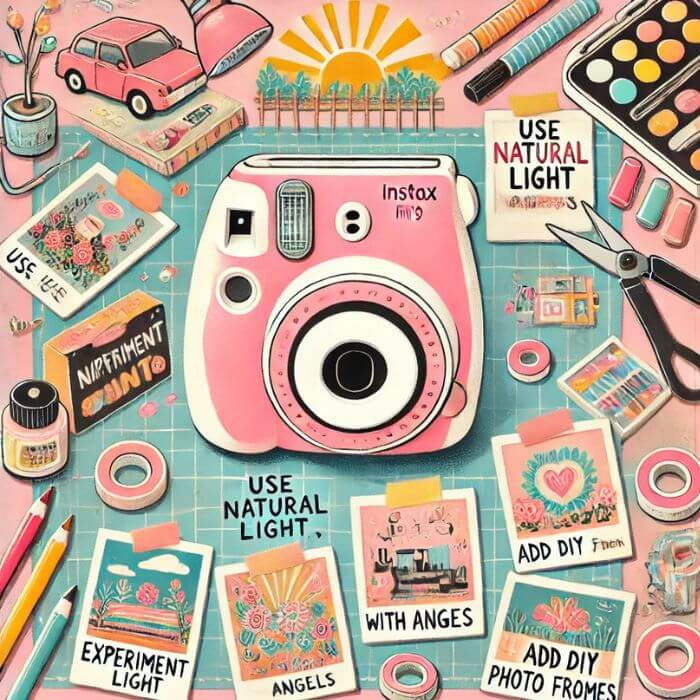
Experimenting With Lighting Conditions
Light plays a crucial role in photography. The Instax Mini 9 makes it easy to play with light. Here are ways to use light creatively:
- Outdoor Sunshine: Capture vibrant colors in bright daylight.
- Cloudy Days: Soft shadows perfect for gentle tones.
- Indoors: Use lamps to cast interesting shadows.
Explore different times of day to see how light shapes your photos.
Fun With The Close-up Lens Attachment
The close-up lens opens new doors for photography. It is perfect for detailed shots:
- Portraits: Capture every detail of your subject.
- Objects: Get closer to see textures you’ve never seen before.
- Nature: Small flowers become large, colorful displays.
Attach the lens, move closer to your subject, and watch the magic happen.

Credit: m.youtube.com
Troubleshooting Common Issues
Troubleshooting common issues with your Instax Mini 9 should be a breeze. Whether your film won’t eject or your photos are blurry, help is here. Let’s dive into solving these pesky problems and get back to capturing memories!
Resolving Film Ejection Problems
Sometimes your Instax Mini 9 may refuse to eject film. No need to worry! Below are steps to get things moving:
- Check the film count: Is the film out? Reload if necessary.
- Inspect battery level: Low power can cause ejection issues. Replace batteries if needed.
- Ensure proper film installation: Incorrectly loaded film can jam. Reload following the guide.
- Remove obstructions: Check the ejection slot. Clear any visible blockages carefully.
If these steps don’t work, your camera might need professional attention.
Fixing Blurry And Overexposed Images
Blurry and overexposed images can disappoint. Here’s a quick fix guide:
| Problem | Solution |
|---|---|
| Blurry Photos | Holding the camera steady is key. Use a tripod for perfect sharpness. |
| Overexposure | Alter the brightness setting. Choose a lower setting for less light exposure. |
Remember to always shoot in well-lit environments, but not under direct sunlight.
Credit: instax.com
Frequently Asked Questions For Instax Mini 9 Settings
How To Use Instax Mini 9 Flash Settings?
The Instax Mini 9 features an automatic flash that fires in low-light conditions to ensure optimal exposure. It’s user-friendly and requires no manual adjustments, activating whenever the camera deems necessary for a bright, clear photo.
Can I Disable Flash On Instax Mini 9?
Unfortunately, the Instax Mini 9 does not offer an option to manually disable the flash. The camera automatically determines when the flash is needed based on the lighting conditions to ensure proper exposure for each picture.
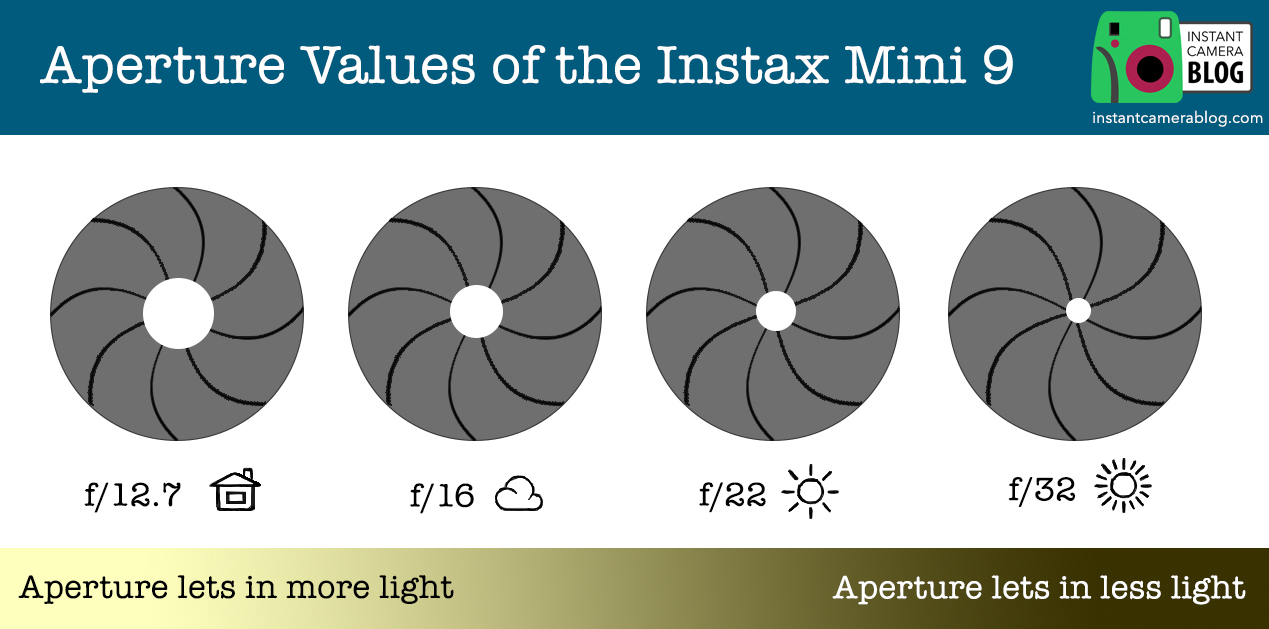
What Do Instax Mini 9’s Light Settings Indicate?
The Instax Mini 9 has a brightness adjustment dial with different light settings indicating the recommended aperture for varying lighting conditions. These symbols guide for an ideal shot by suggesting adjustments to let in the perfect amount of light.
How To Ensure Sharp Photos With Instax Mini 9?
For sharp photos, ensure you’re shooting in good lighting and hold the camera steady. Use the Instax Mini 9’s close-up lens attachment for subjects between 35-50cm away and aim to shoot subjects at least 60cm away without it.
In Conclusion:
Navigating the Instax Mini 9 settings is key to capturing those perfect moments. Embrace the simplicity of the camera’s features to elevate your photography game. With these tips, crisp, vibrant photos await. Happy snapping, and let your creativity shine through with every click!
